In the vast realm of 3D visualization, Blender stands out as a powerhouse tool, offering unparalleled flexibility and capabilities.
Whether you're a seasoned professional or just stepping into the world of 3D design, Blender provides an expansive platform to bring your visions to life. From intricate architectural renderings to dynamic animations, Blender's versatility is evident.
This article will take you through the step-by-step process of getting started with Blender and visualizing a 3D scene.
Let's dive in
Step 1
Open Blender, select "new file" - "general"
Step 2
Delete the default cube
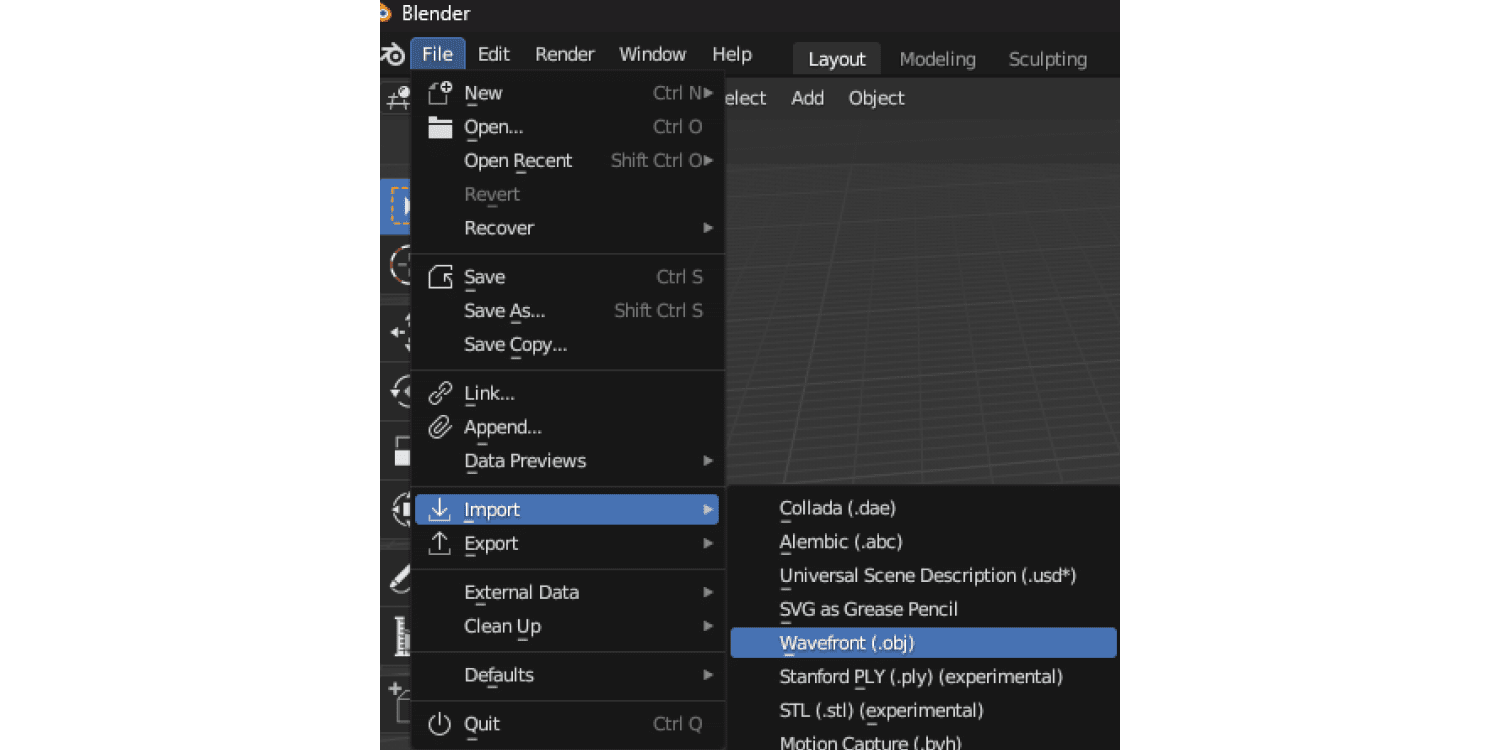
Step 3
click on "File" - "import" - "wavefront (obj)" and select the obj file with your 3D scene, click "import" and navigate to your area within the grid.
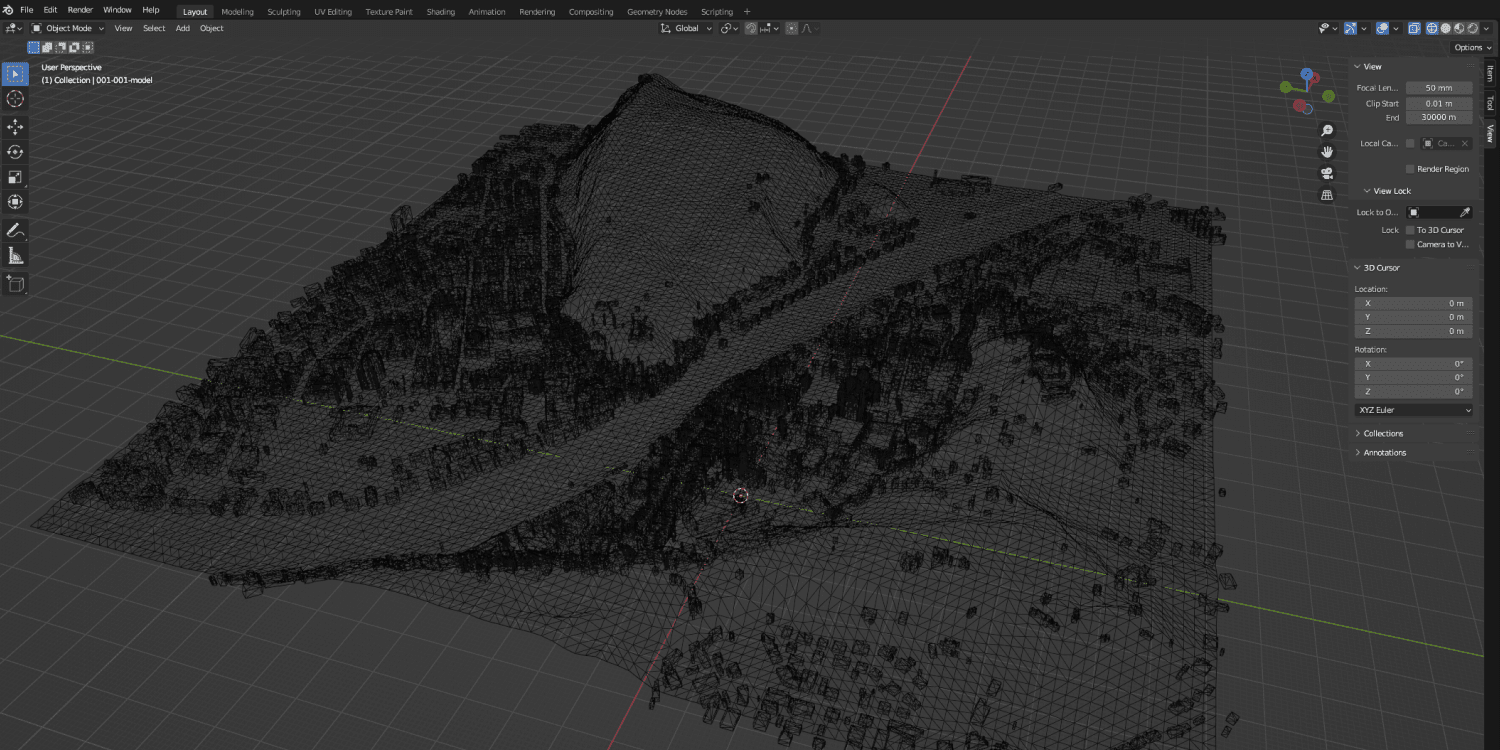
Step 4
By default, the view is set to 1000m distance from your area, which means you may only see part of your scene (if it covers an area that extends further than 1000m).
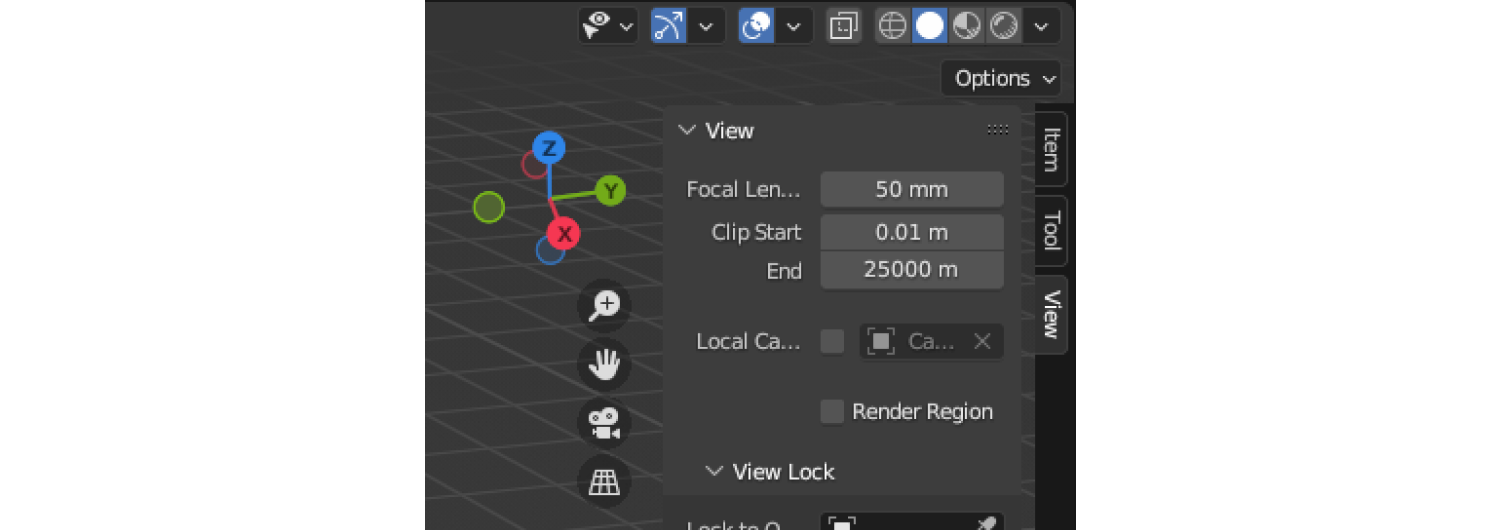
Step 5
Click on the tiny arrow at the top right-hand side of the scene view to bring up "items", "tools" and "view" menu

Step 6
Under "view", you can change the distance from 1000m to, e.g., 25000m so that your entire scene is visible at once (this is only relevant if your area extends further than 1000m).
Step 7
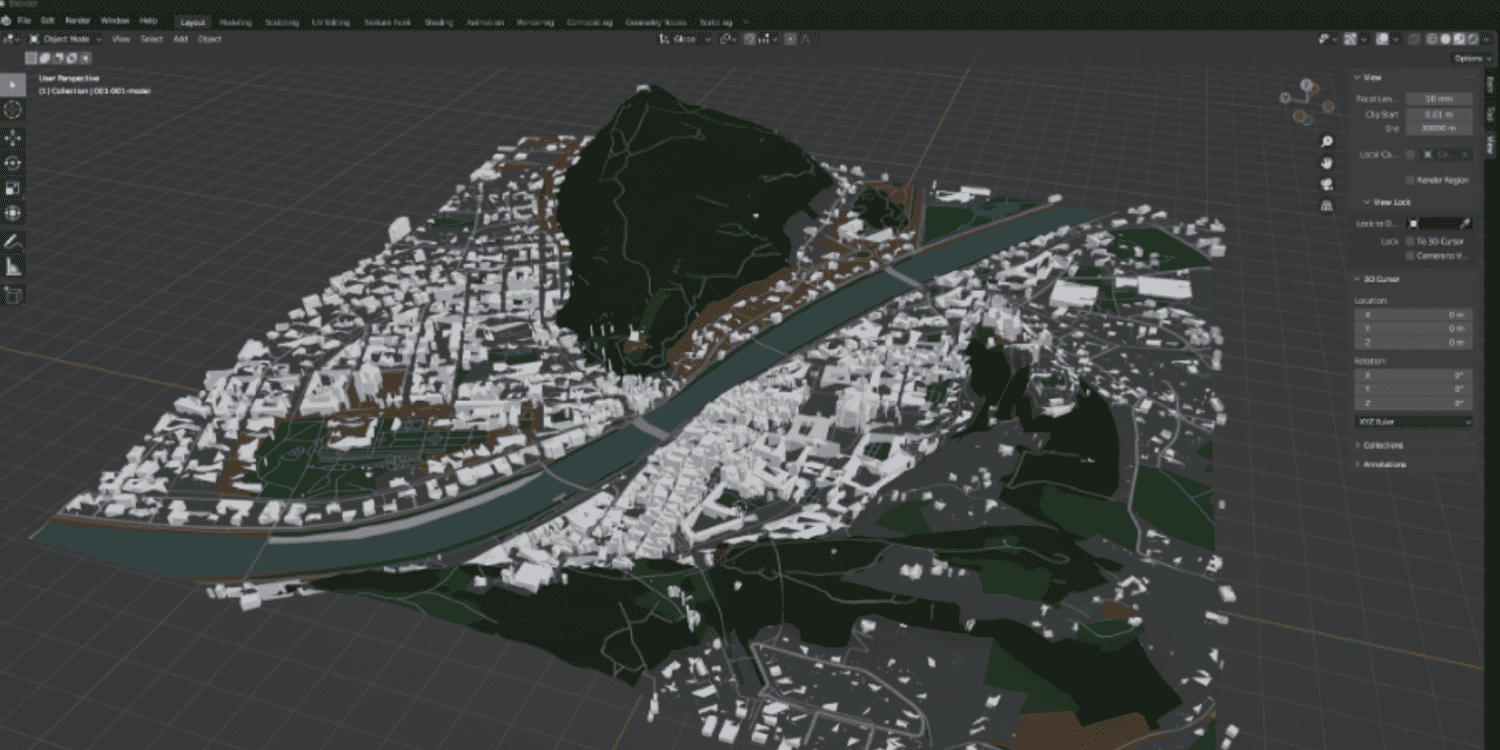
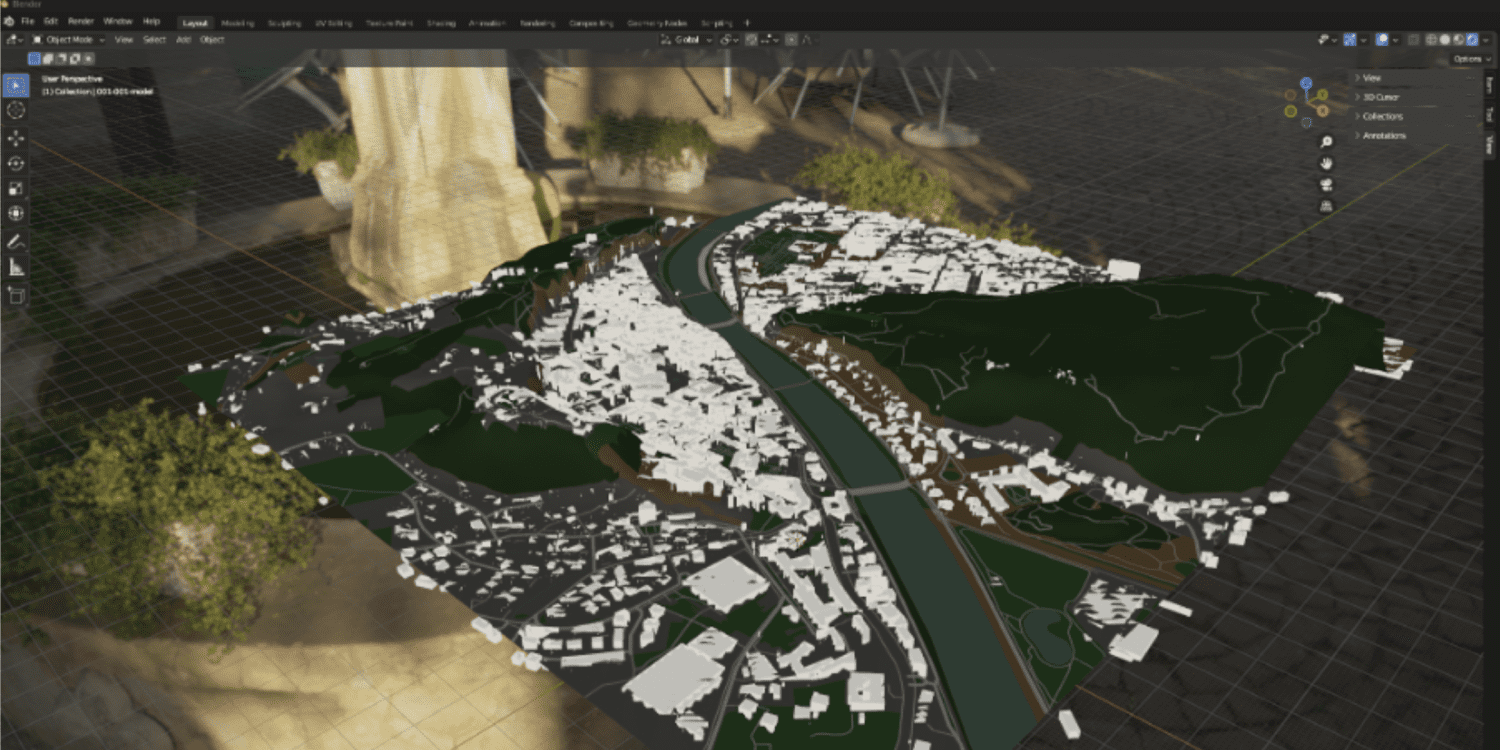
You can change the appearance of your area by changing the viewpoint shading at the top right corner of the scene view.

You can change the appearance to a simple wireframe preview:
Or solid preview:
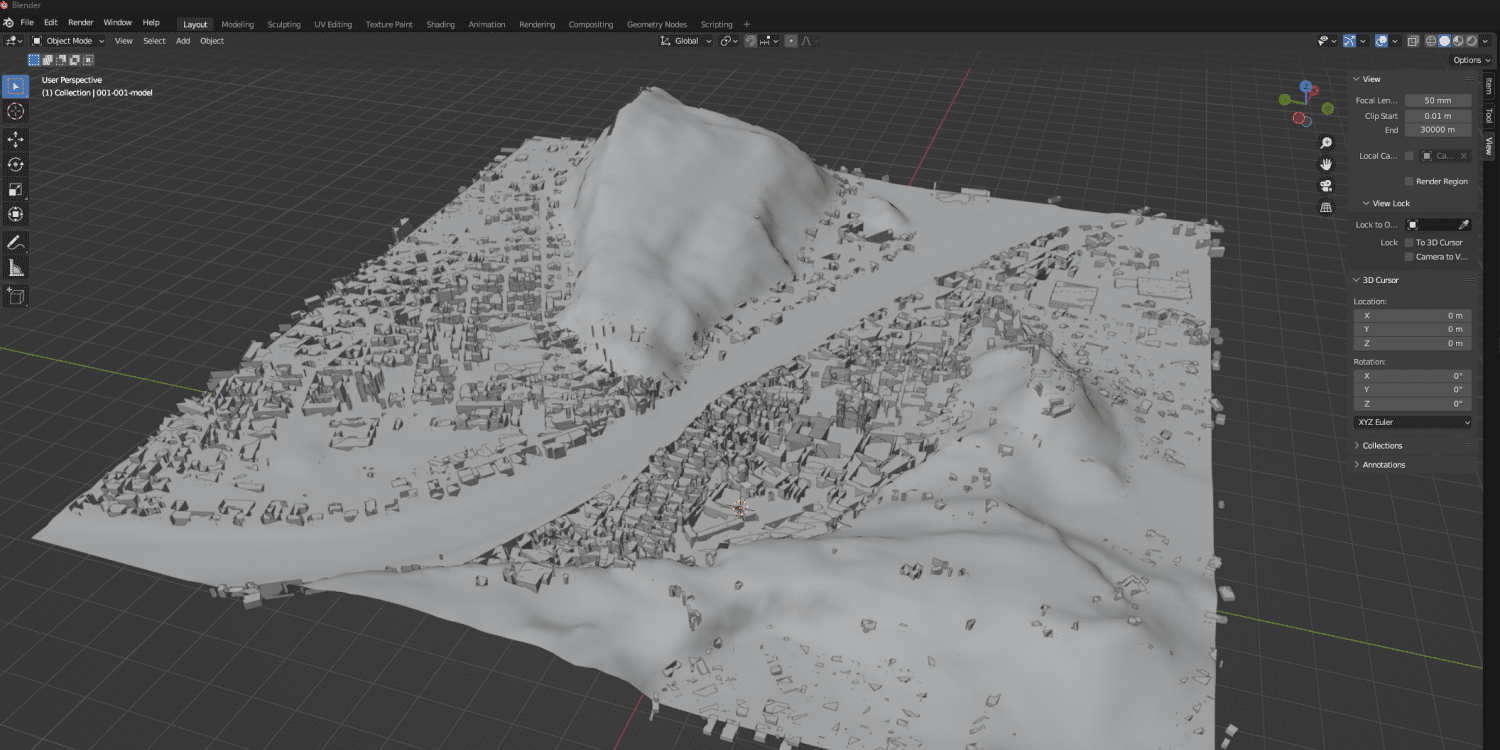
Or preview with textures:
Or a preview of how it looks rendered:
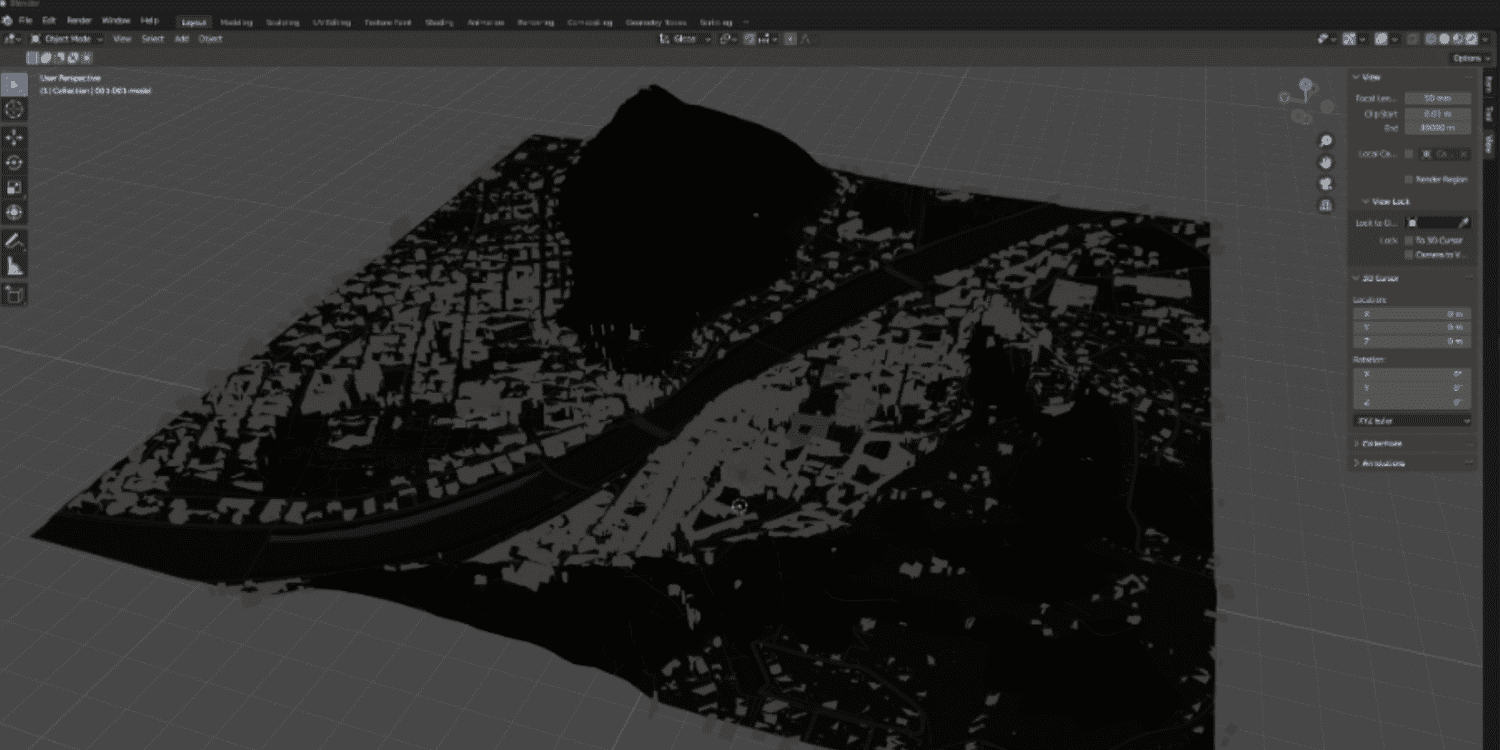
You will notice with the rendered preview that there is no source of light. This applies to all 4 preview types, but only becomes obvious with the rendered preview.
Step 8
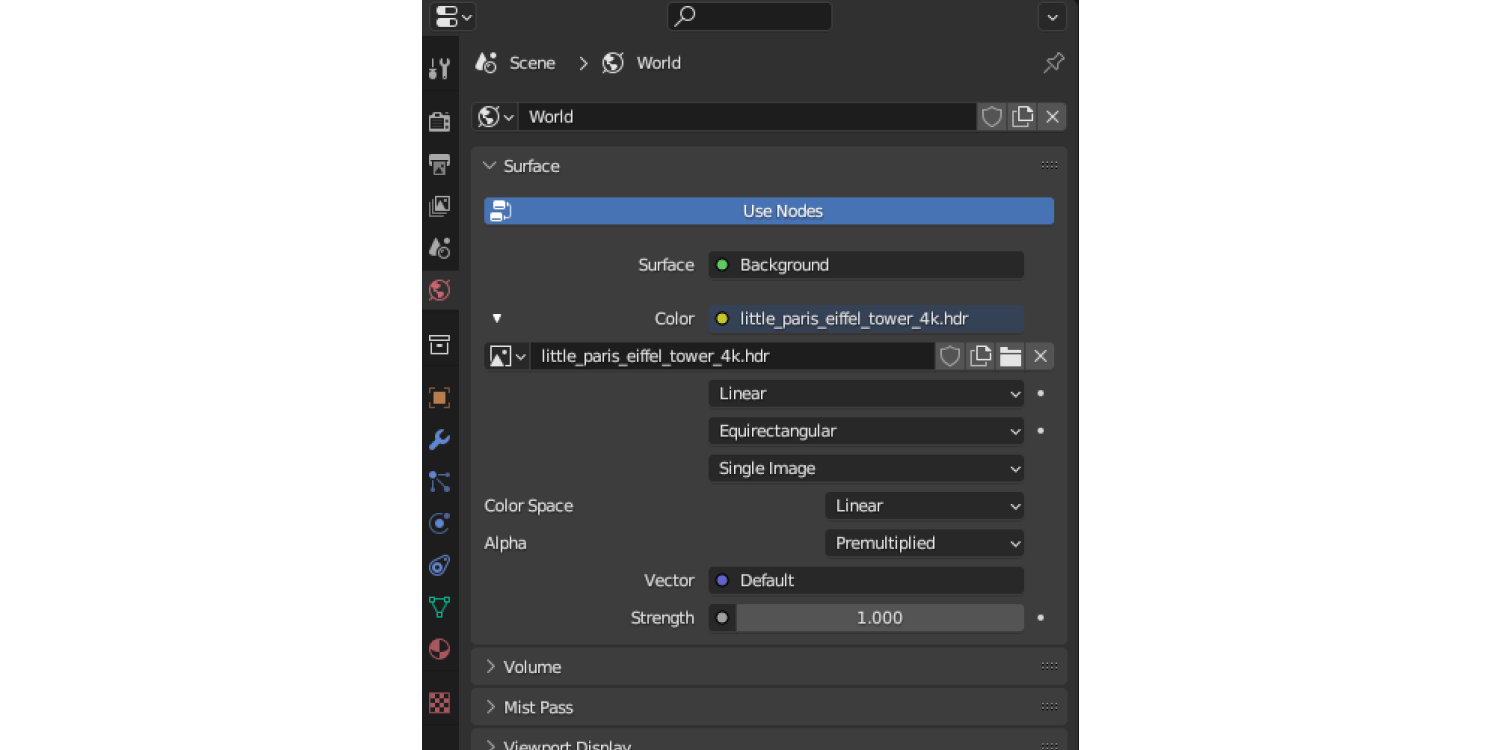
In this step, we must change the world settings, which basically simulates the position of the sun relative to the area (thus giving us a light source) and provides other details, such as reflections.
Therefore, go to "world properties", and click on the color icon and select "environment texture".

Click on "open" and select an .hdr file to use.
A good source of free .hdr files is polyhaven.com.
When selecting an .hdr file, make sure that it is from the same hemisphere as your scene area, otherwise the shadows will be on the wrong side.
It will then have an image in the background and may look something like this:
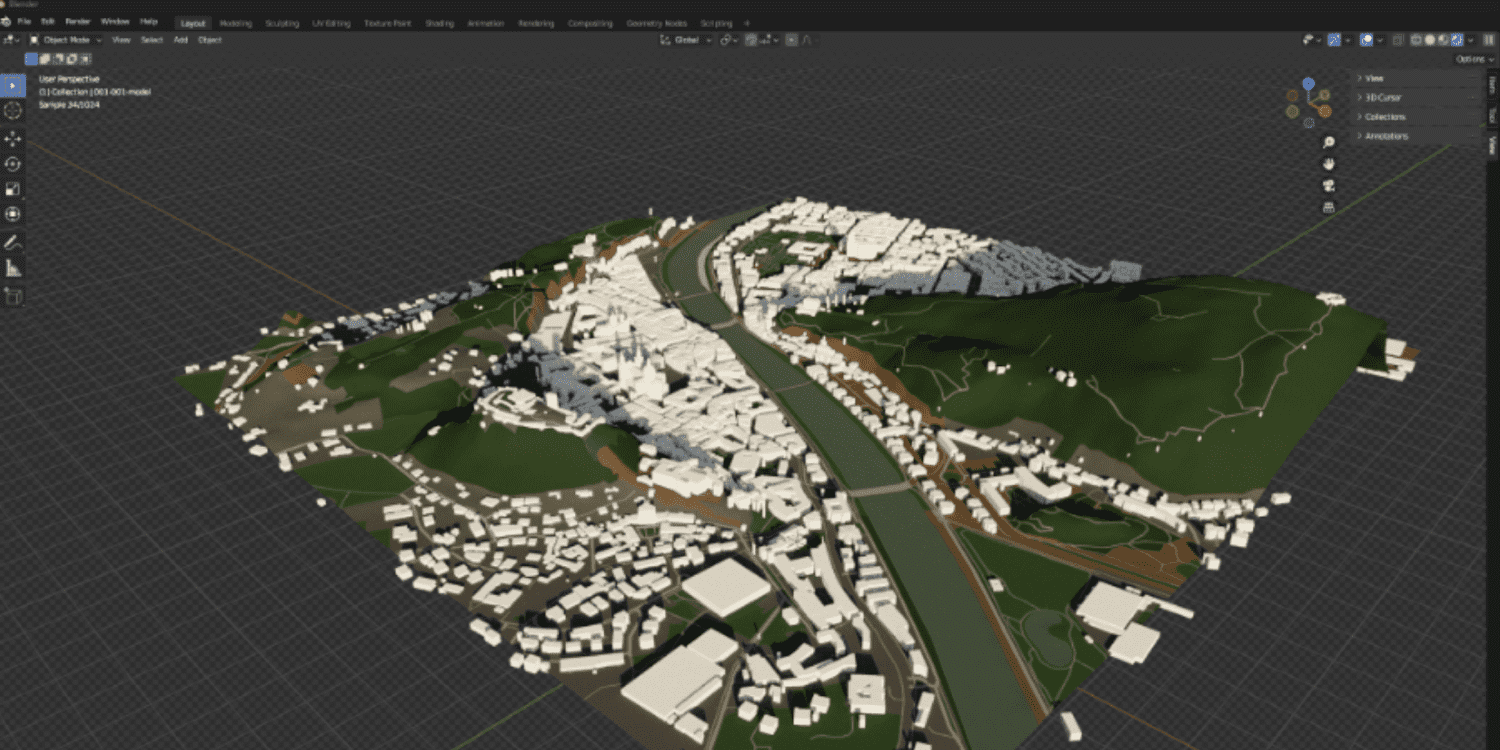
Step 9
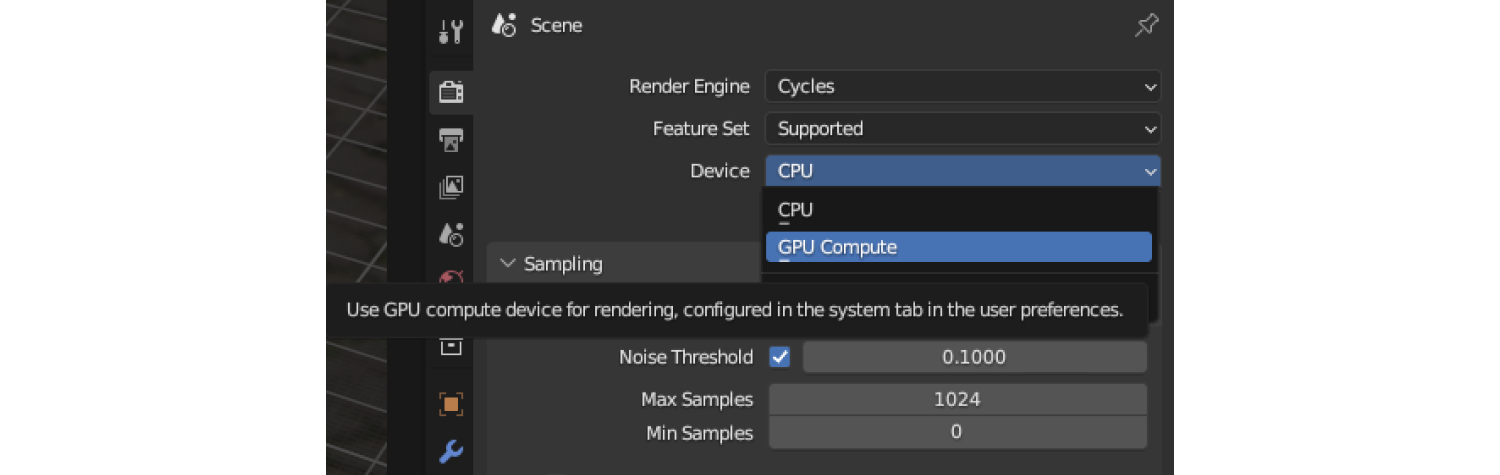
Now is a good time to change the render properties by clicking on "render properties".
Change the render engine from "eevee" to "cycles". Should you have decent GPU, you can change the device from CPU to GPU compute.
Under "film", you can select "transparent" to get rid of the .hdr image in the background.

You scene should then have a light source:
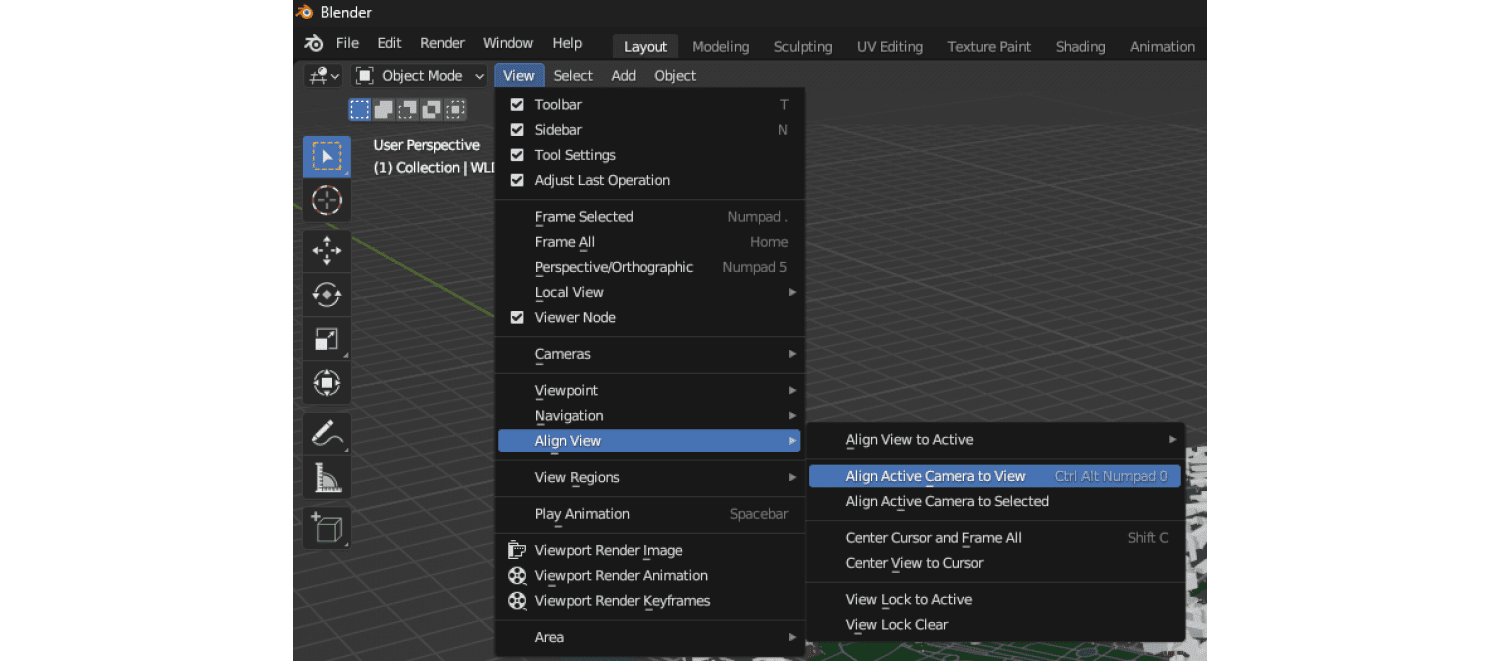
Step 10
Setting up a camera - this is an important step before you can render any images from your scene. When you click on "render", the program doesn't render the scene as you see it, but rather from the perspective of the camera, which points at the default location until this is changed.
You can check the camera view by pressing zero on the number pad of your keyboard (click zero again to navigate back to your scene).
The easiest way to set the camera view is using your current viewport view. Therefore, you may want to change this back to solid- or texture preview rather than render preview as render preview will be much slower.
Position the area as desired within the viewport and go to "view" - "align view" and click "align active camera to view" (or use the keyboard shortcut alt + control + numpad 0)
If the scene appears gray, the camera settings may need to be adjusted. Therefore, go to "object data properties" and change the endpoint to, e.g., 10000.
Step 11
Now is a good time to have a first look at the rendered image. Therefore, go to "render" and click "render image" (or use the keyboard shortcut F12).
This may take a while!
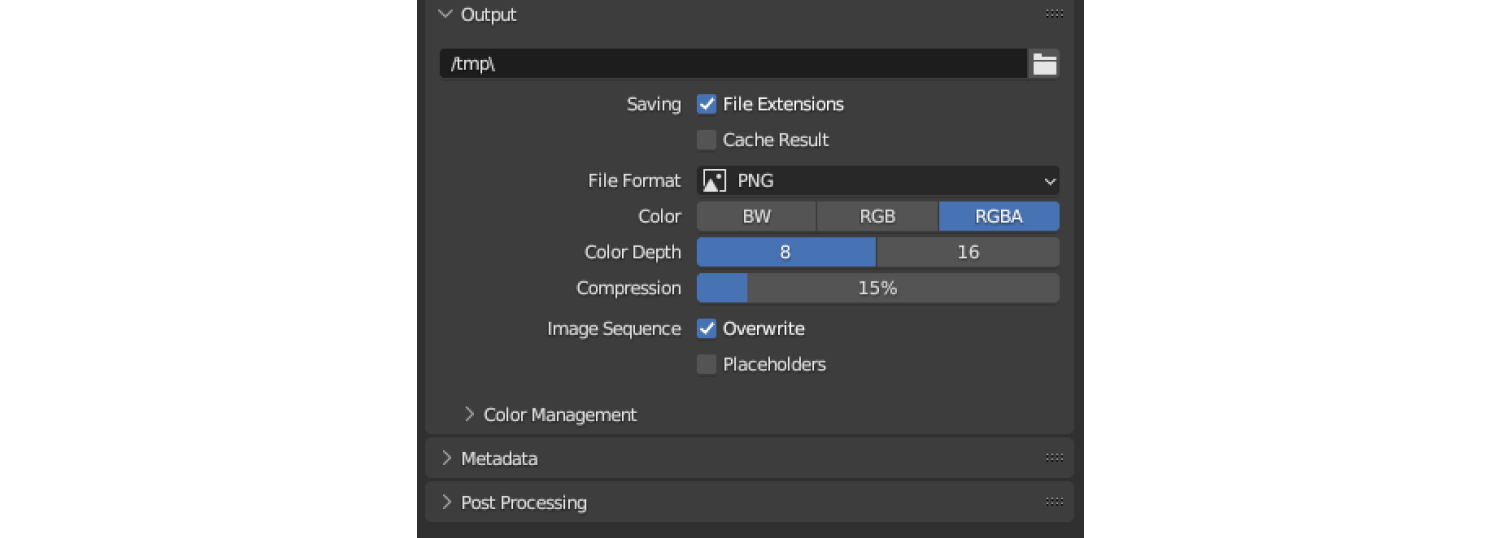
If you want to change any of the output settings, e.g., size, ratio, quality, format, etc., go to "output properties".
And there you have it:
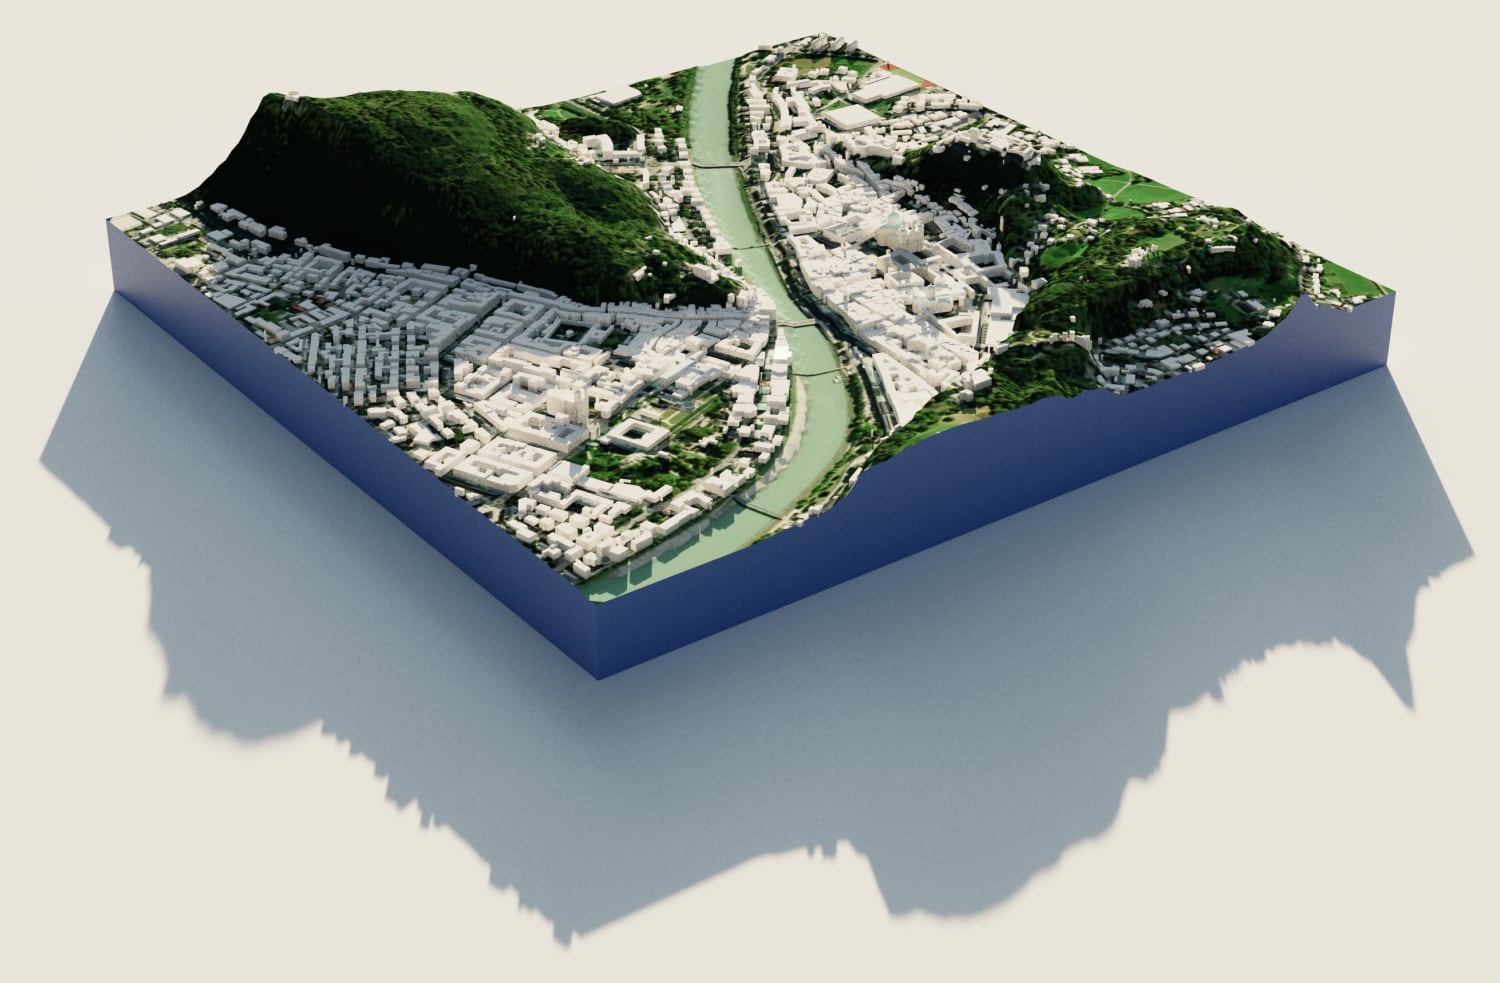
From here, your options for manipulating your scene are vast and multifaceted… from producing intricate video animations, refining architectural structures, or incorporating or modifying environmental elements, you can tailor the look of your scene in various ways.
When paired with geospatial gems like ONEGEO 3D data, Blender shines, bringing urban landscapes and infrastructure to life in vivid detail. As the worlds of geospatial tech and 3D visualization merge, the horizon of innovation expands.
If you're ready to have a go, jump on over to our data page data page, get a $50 coupon code and try it out for yourself.